12 mars 2024
After installing the demo version of JDE EnterpriseOne 9.2 (See Part 1 and Part 2), we cannot submit any UBE locally and we get the following error message:
“Local submission is not supported from skinny batch versions/menus”
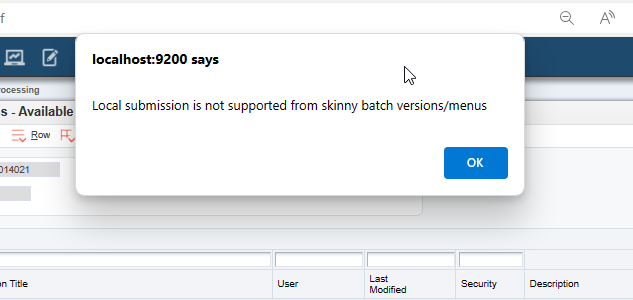
Fig 01
This document is a step-by-step guide to resolve the issue and to install a local printer on Oracle JD Edwards Enterprise One 9.2 Standalone Demo.
Here are the steps to complete the Demo:
- Fix "Local submission is not supported from skinny batch versions/menus" error
- Fix “Failed to communicate with security server” error
- Define a printer and the default printer in EnterpriseOne Standalone
- Test that the printer is working properly
- Download and install CutePDF Writer
- Setup CutePDF Writer in EnterpriseOne
- Test that CutePDF Writer is working properly
Let’s start!
1. Fix "Local submission is not supported from skinny batch versions/menus" error
Step 1: In Windows 7, open the control panel and select System:
Fig 02
In Windows 11, select Start and type System. The About page shows you all the information about your PC.
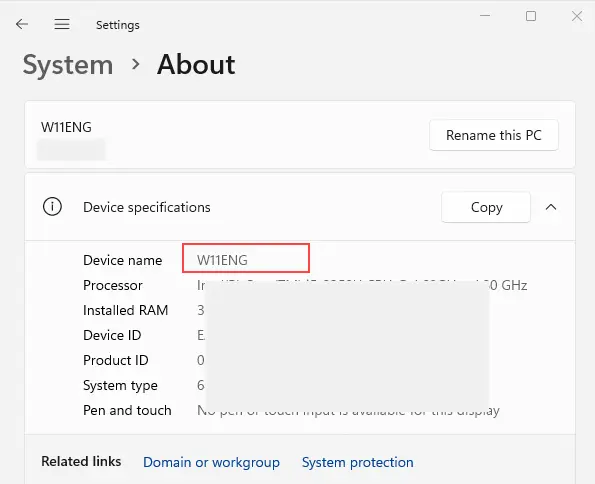
Fig 03
Write down the device name.
Step 2: Start JD Edwards EnterpriseOne.
 Fig 04
Open the P986115-Logical Data Sources app in the Solution Explorer Fast Path or from menu in the System Administration Tools group:
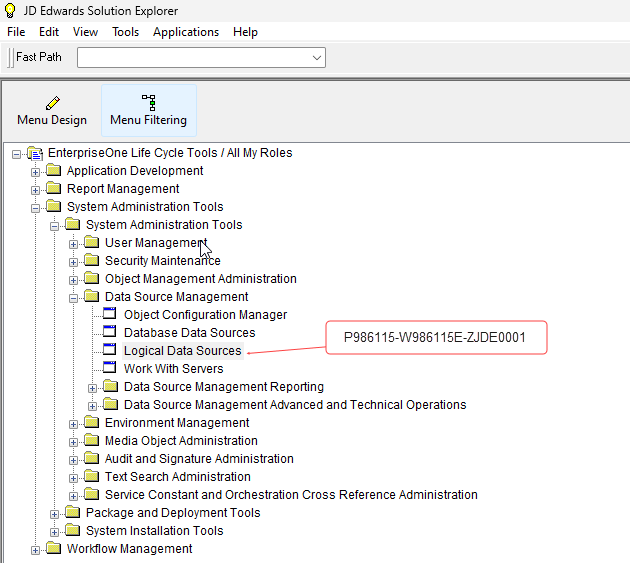 Fig 05
- Select Find.
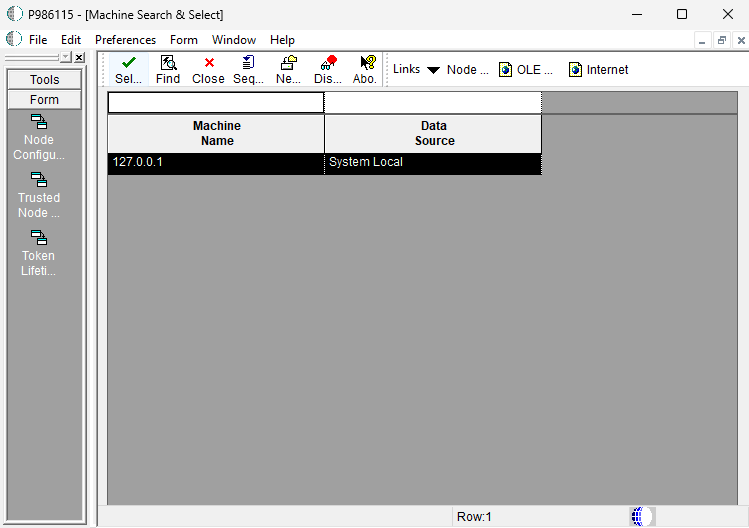
Fig 06
- Double Click on System Local in result. Click Find.
- Next in Work With Data Sources form, click Find and select the row with Local in Data Source Name column.
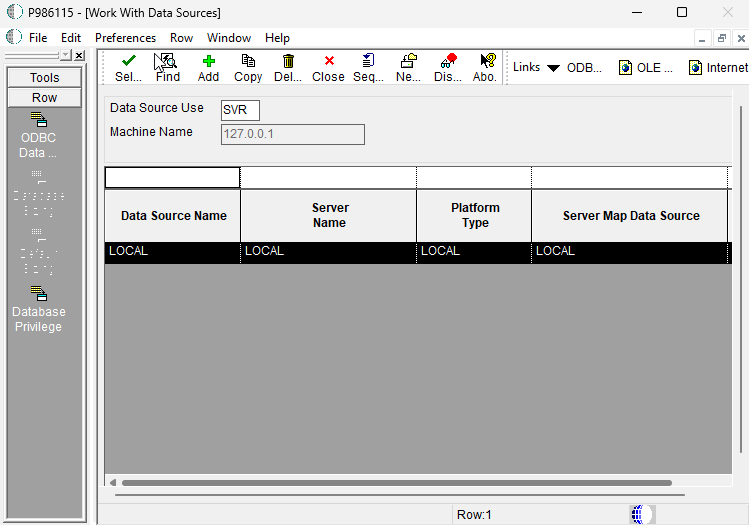 Fig 07
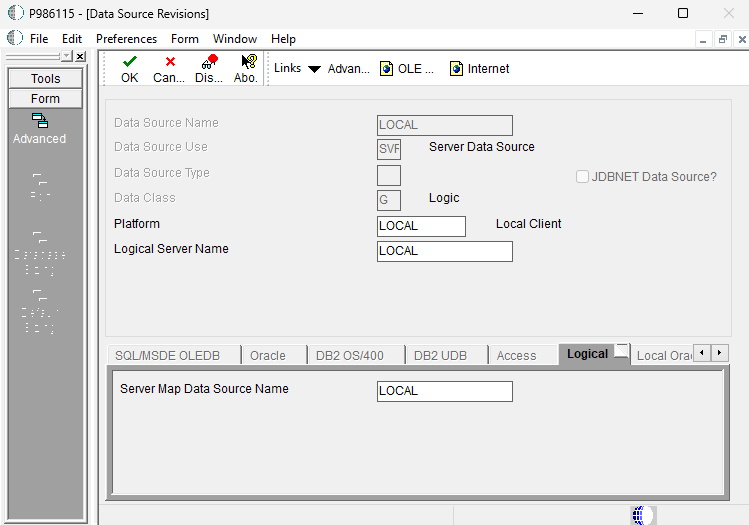
Fig 08
- In Data Source Revisions form, change the ‘Logical Server Name’ to the local host name (‘W11ENG’ in our example), and in ‘Logical’ tab, change ‘Server Map Data Source Name’ to ‘System Local’.
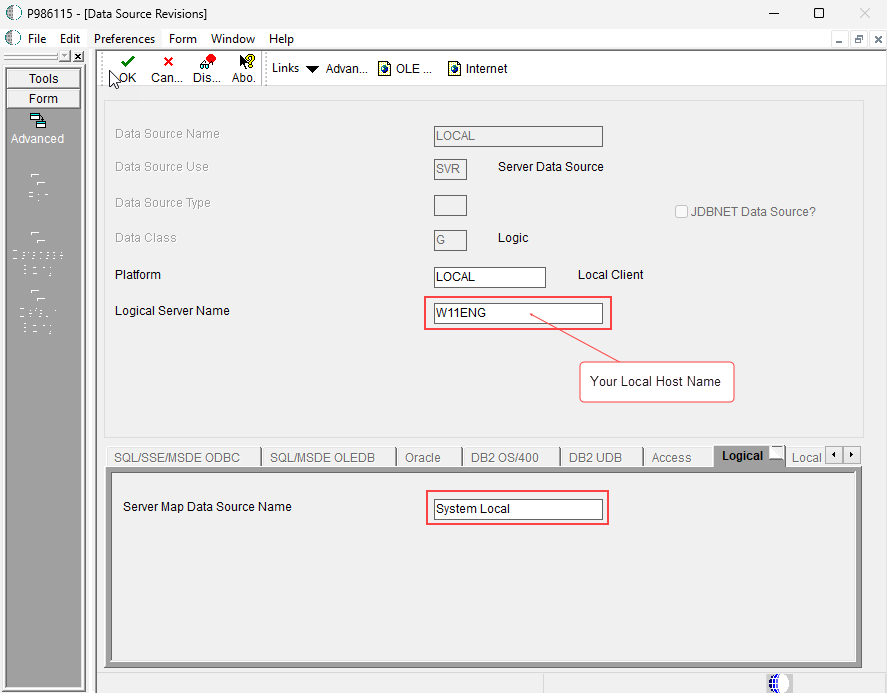
Fig 09
- Click OK to update. Log off and restart your E1 standalone.
2. Fix “Failed to communicate with security server” error
When you submit a printout, you may encounter the following error: “Failed to communicate with security server: Unable to locate Security Server”.
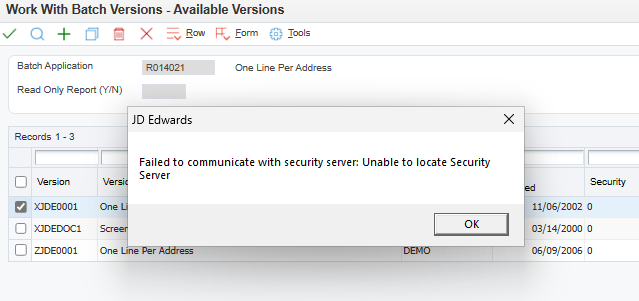
Fig 10
We need to make a change to the jde.ini file to fix the error:
- Open Windows folder. Edit jde.ini with notepad.
- Go to [Security] section, in SecurityServer line, replace “localhost” with the machine name and save jde.ini.
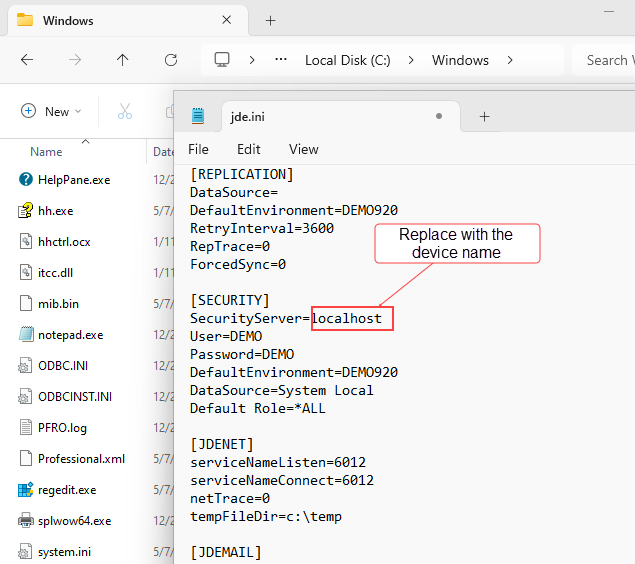
Fig 11
- Restart your computer.
3. Define a printer and the default printer in EnterpriseOne Standalone
Within JD Edwards EnterpriseOne, you have the option (On screen) of viewing the PDF output using a PDF Reader app or sending the report directly to a printer.
If you select On Screen, the system creates a PDF file in PrintQueue without asking you for a printer.
Select To Printer option to send the report to the defined printer. The system looks first for a printer defined in Report Design Aid, if no printer is defined, the system uses the default printer defined in the JD Edwards EnterpriseOne Printers application.
When you send the report to a printer and no printer is available, you get an error in the Printer Selection screen.
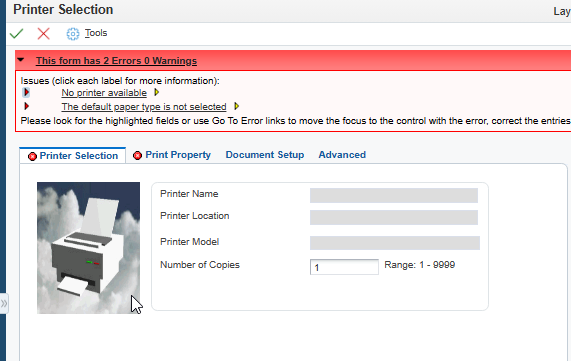
Fig 12
If a printer is available with a valid printer name, the server automatically creates a PDF file using the settings associated with the selected printer unless event rules override those printer settings.
We will define a printer configuration that we call “PDF File” whose settings will be used only to create the system-created PDF file. When a report is submitted the printer is selected without the “No printer available” error and a PDF file will be created.
Go to the P98616 - Printers app.
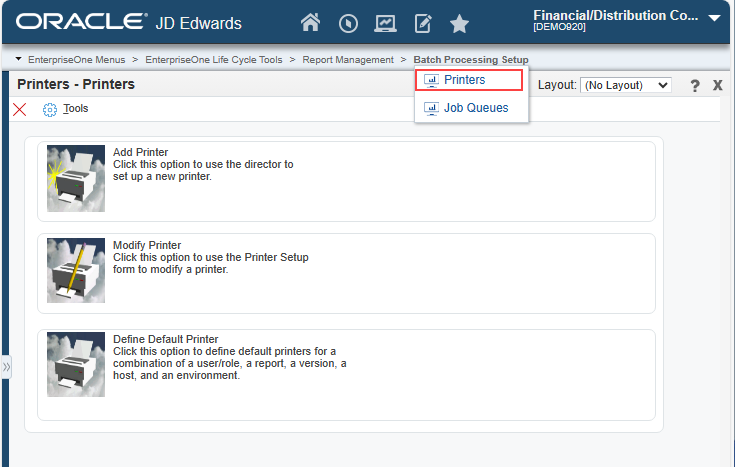
Fig 13
Add Printer
 Fig 14
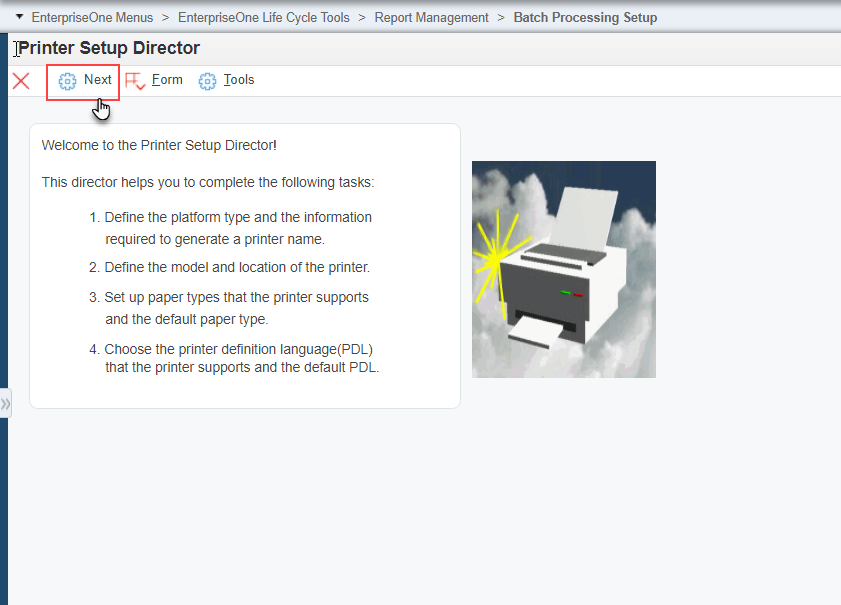 Fig 15
- Fill the form as screenshot shows.
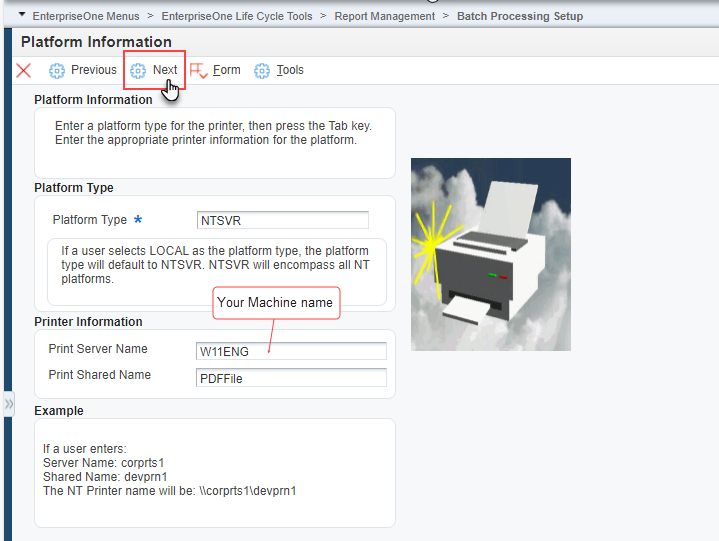 Fig 16
- Platform Type: The type of hardware on which the database resides. Enter NTSVR.
- Print Server Name: The name of the machine that receives documents from clients. Enter your machine name.
- Print Shared Name: The name of the printer to which the report will be sent. Enter PDFFile.
- Click Next. Complete the first tab.
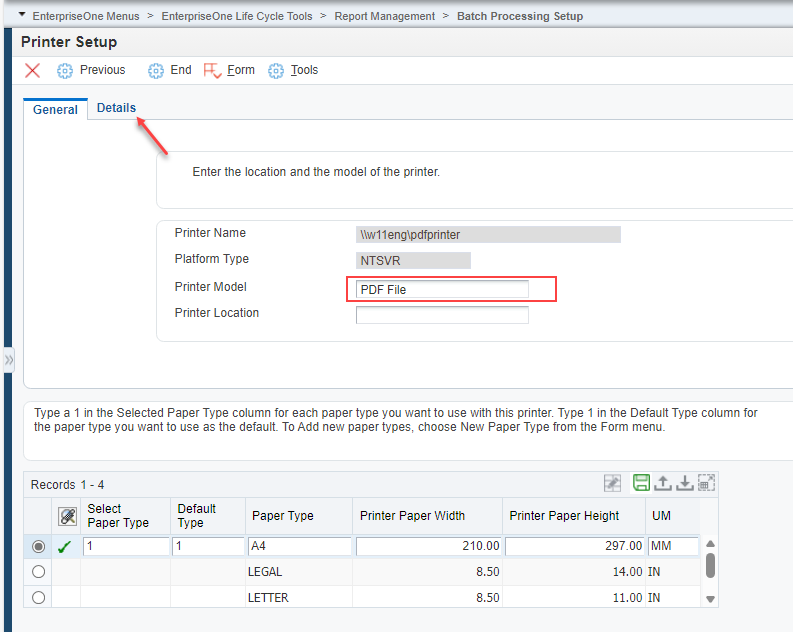 Fig 17
- In Printer Model field type (do not select with the visual assist) “PDF File” and select the Paper Type and the Default Type. Complete the second tab.
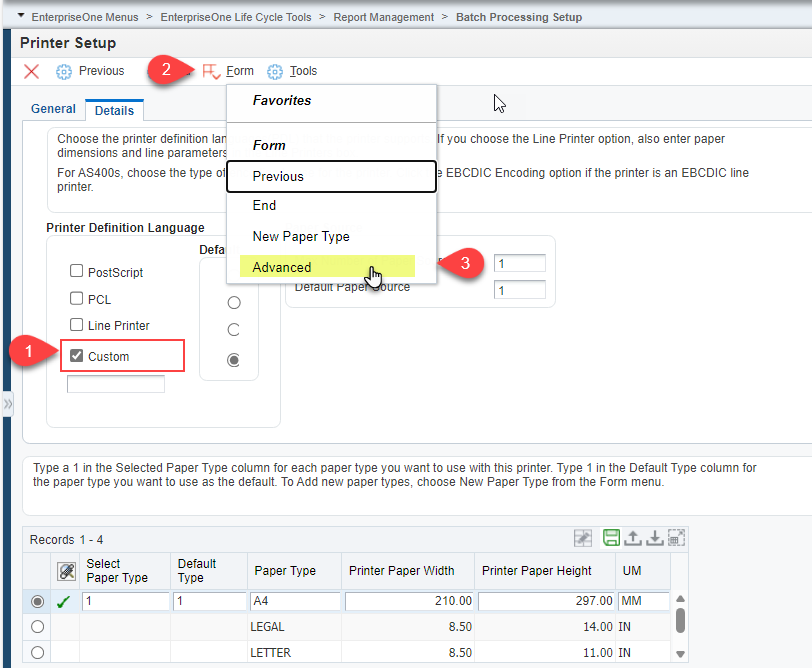 Fig 18
- In Printer Definition Language choose Custom and select the default option. In form exit select Advanced.
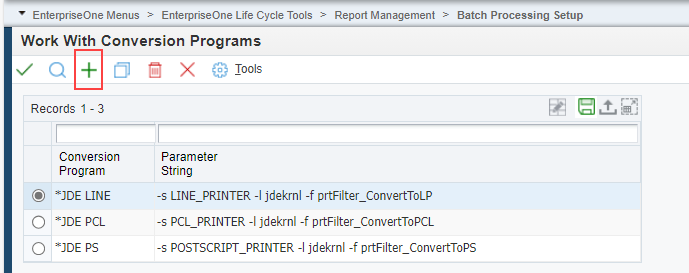
Fig 19
In Work With Conversion Programs form add the PDF conversion Program:
- Conversion Program: *JDE PDF
- Parameter String: -s POSTSCRIPT_PRINTER

Fig 20
- Confirm and click Find.
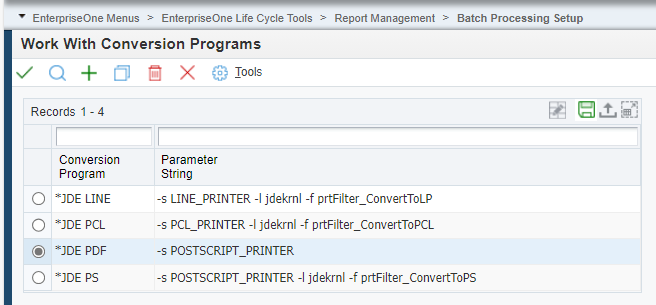
Fig 21
- Select *JDE PDF row.
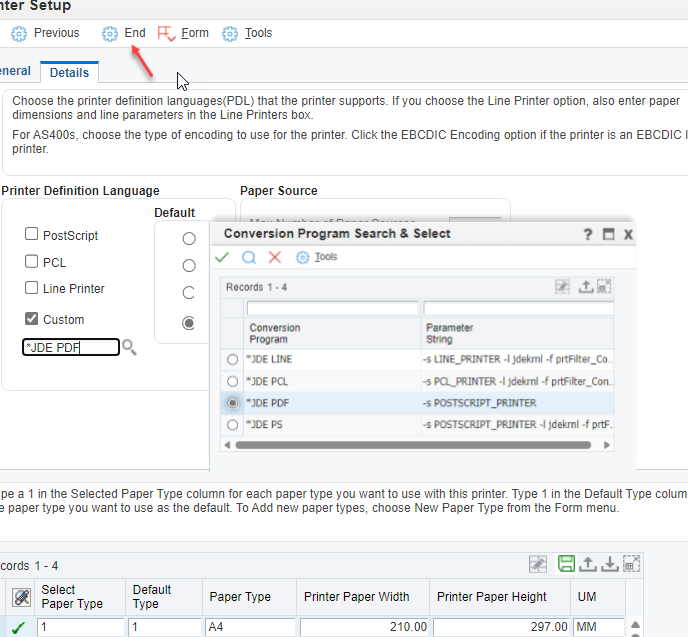
Fig 22
- Click End.
Modify Printer
 Fig 23
- To view or to modify printers, click Find and select your printer.
- To delete a printer, select the printer and select Delete.

Fig 24
Define Default Printer

Fig 25
- Click Find to display the default printers.
- By default, sample printers are installed in EnterpriseOne Standalone.
- Make all rows non-active: Select one row with AV-Active status. Right-click and select Change Status to switch to NA-Not Active.
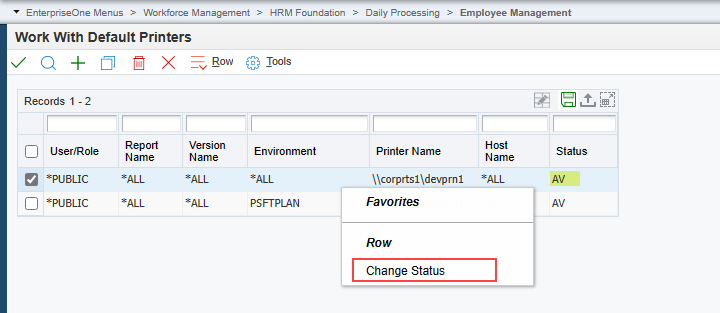 Fig 26
In the rest of the demo we have removed the default printer examples included in the standalone version.
- Select Add.
Now, we set up our new printer as the default printer for the local host noted in step 2 above.
- Click Add and enter the following values:
- User/Role: *PUBLIC. Leave it as default.
- Report name: *ALL. Leave it as default.
- Version Name: *ALL
- Environment: DEMO920 in standalone version.
- Printer Name: Select your printer with the visual assist.
- Host Name: *ALL
- Object Status: AV (Active).
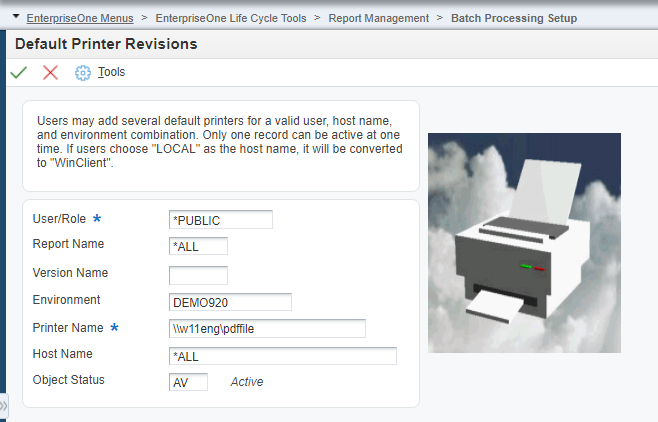
Fig 27
- Click OK to update. Select Find and Close.
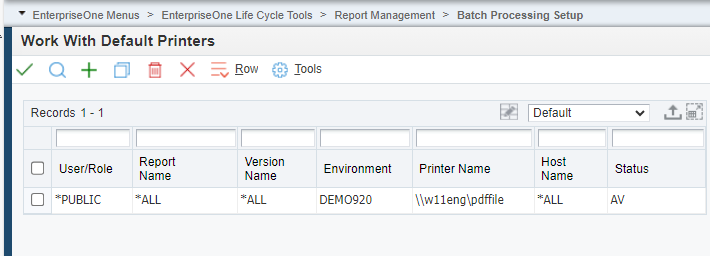 Fig 28
4. Test that the printer is working properly
- Open EnterpriseOne Menu. In EnterpriseOne Fast Path, open P13700 Planning Workbench app.
- Select a work order (e.g. WM 451557). In Row Exit, select Print WO.
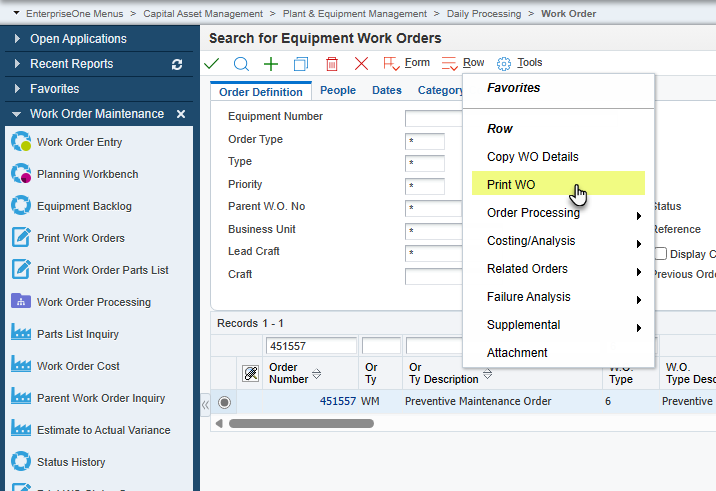 Fig 29
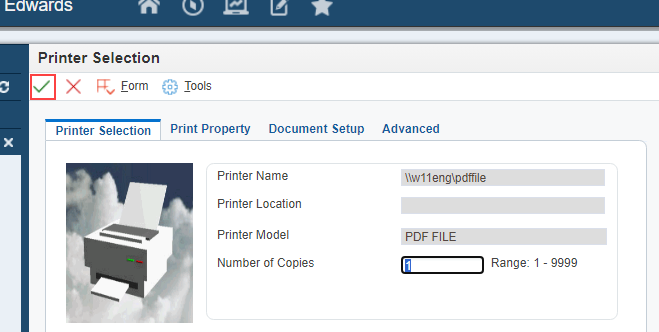
Fig 30
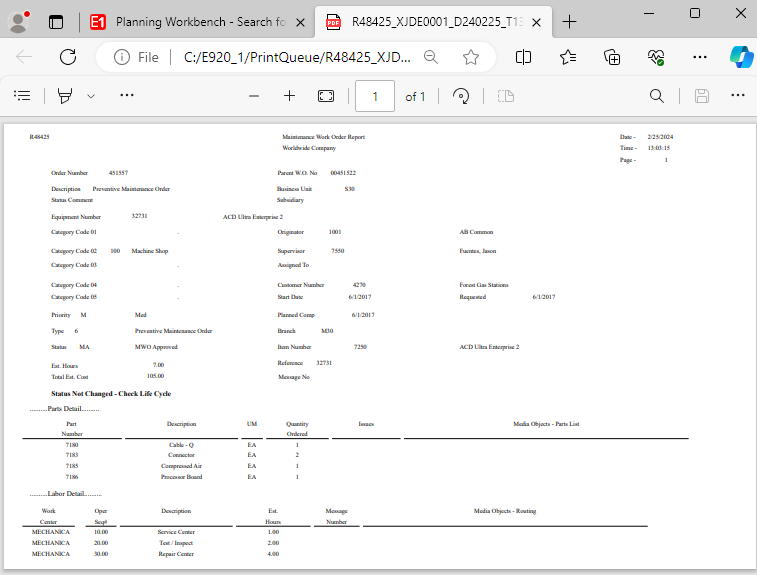
Fig 31
At this point we have fixed the error and we can continue to take advantage of Enterpriseone features and print reports without problems.
We have worked so far with a not installed printer. But some users have printers and want to use them to print reports. So, we will continue the demo and show how to install a printer.
See more in Part 2.
